The short answer
- Never ship your OpenAI key in the app. Not in Swift code,
.xcconfig,Info.plist, the Keychain, or a download after launch. Anyone who has the app can get it out. - Let a server call OpenAI for the app. A small serverless function is enough. The key lives there, and the app never sees it.
- Make the server check two things on every request:
- Is it from your real app? Apple’s App Attest, with a fresh proof on every request
- Is it within limits? Allowed models, size caps, an allowance for each install and a cap for the whole app
- Add sign-in and a payment check when your allowance is worth protecting. Sign-in makes an allowance belong to a person instead of an install. A payment check gives the bigger allowance only to people who paid.
- Build these checks yourself, or use a gateway that already runs them. App AI Gateway, the product we build, holds your key and runs all of them, so your app calls it instead of OpenAI. The comparison of AI gateways for mobile apps covers the other ready-made options.
The rest of this article walks through each step: the risk it removes, and what it still leaves open. The examples assume an iOS app with an AI feature billed to your OpenAI account, where free users get a few requests a day and a Pro subscription gives more. The same ideas apply whatever backend, sign-in provider or subscription setup you use.
Why your OpenAI key can’t live in the app
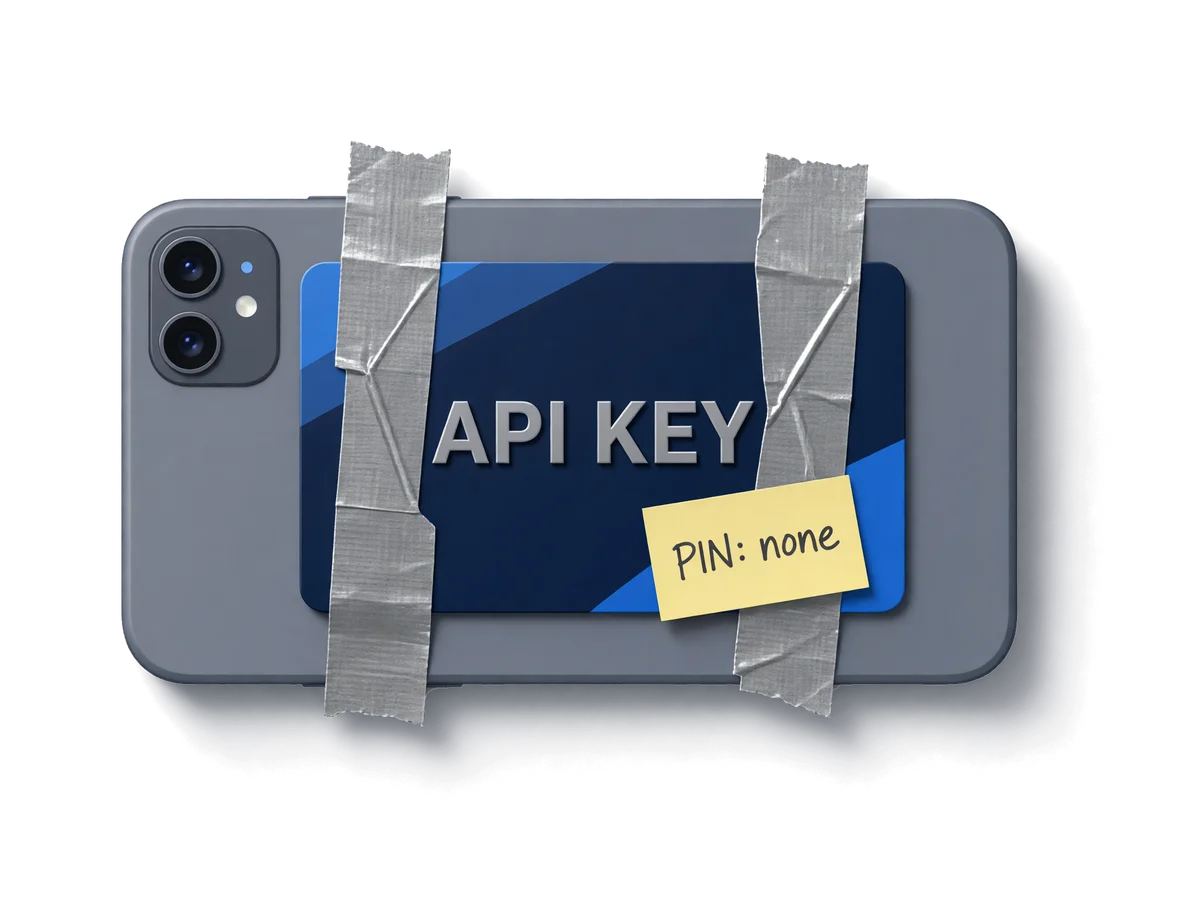
Think of your OpenAI API key as a company credit card with no PIN. Whoever holds it can spend, and OpenAI sends the bill to you.
The quickest way to add AI is to call OpenAI straight from Swift with the key in the request. It works, but now every copy of your app carries your card. Someone can pull the key out of the app file, or route their phone through a traffic-inspection tool and read it from the outgoing request. Then they can use it from anywhere, without your app, your paywall or your limits.
Your app on every iPhone contains your OpenAI key and calls OpenAI with it. Someone extracts the key from the app and makes their own calls with it. OpenAI bills both to your account.
There’s usually no warning. A developer who shipped a mobile app that called OpenAI directly described how it started:
Everything was looking normal, and we were seeing very modest API cost, day over day, $0.05 $0.07 $0.06 etc. Then, out of nowhere, it jumped to over $120 in a single day.
OpenAI’s own guidance says the same: a key in a browser or a mobile app lets anyone who takes it make requests on your behalf.
What about hiding the key?
Developers try many hiding places. Each one solves a real problem, just not this one:
| Where the key goes | What it does protect | Why the key still leaks |
|---|---|---|
| A string in Swift code | Nothing | The compiled app contains the string. |
.xcconfig or Info.plist | Keeps the key out of Git | The build copies the value into the app you ship. |
| Obfuscated or encrypted | Slows down a casual look | The app must decode it to use it, so the plain key exists on the device. |
| Keychain | Data stored on the device | The app reads the key back to make the call. |
| Downloaded after launch or login | Keeps the key out of the app file | The key arrives on the device and goes out in every request. |
| Certificate pinning | Makes traffic inspection harder | It raises the effort, but someone who controls the device can get around it. |
The rule behind every row: if your app can use the key, the person holding the phone can get it.
Downloading the key is the most convincing trap. A developer on r/SwiftUI kept the key in a cloud database that only their attested app could read, and still found it “constantly being leaked (every 2 to 3 days)”. Attestation guarded the database. Once the app had downloaded the key, nothing guarded the key.
Keychain is still the right place for a user’s own credentials, such as an OpenAI key the user typed in and pays for themselves. That is a different design. This article is about your key.
Move the key to a server
The fix is to stop handing out the card. Keep the key on a server and let the server make the OpenAI call for the app. The app sends its request to your server, without any key. The server adds the key, calls OpenAI and returns the result.
Your app holds no key and sends its requests to your server. The server adds the OpenAI key and calls OpenAI.
“Server” sounds bigger than it is. You don’t need to rent and maintain a machine: a small serverless function is enough. Whatever runs it, keep the key in your platform’s secret storage, never in source code or the repository, and return only the result, never the key.
Why a server alone isn’t enough
The key is safe now. Your money isn’t. The server has a public URL, the URL is inside your app for anyone to find, and the server calls OpenAI for whoever asks. A stranger no longer needs your key. They can use your server.
Here is the same setup as before, with someone else added. They don’t need the key, only the URL:
Your app holds no key and sends its requests to your server, which adds the OpenAI key and calls OpenAI. Someone finds the server’s URL in the app and calls the server directly. The server calls OpenAI for them too, and OpenAI bills both to your account.
This is the usual next question. A developer moved their OpenAI call into a serverless function after their key was compromised, then asked on Stack Overflow whether the function was “automatically restricted to being called from my app”. The accepted answer: no. Anyone who knows the endpoint can call it “with whatever prompt they want to send to OpenAI, and make that call on your API key.”
It’s common in shipped apps too. In a 2026 study of 444 iOS apps with AI features, researchers found exploitable credentials in 282 of them. About a third of those leaks were not keys inside the app at all. They were backend proxies that answered unauthenticated requests: those developers moved the key and stopped there.
Back to the credit card. The card is locked in the office, but your server is now a clerk who pays for anything anyone asks. Before paying, it should ask two questions every time, and two more when what it hands out is worth protecting:
| Question | What answers it | Who it stops |
|---|---|---|
| 1. Is this request from my app? | Apple’s App Attest, on every request | Scripts that call your URL or replay a copied request |
| 2. Is this request within limits? | Allowed models, size caps and allowances | Loops, huge inputs, runaway bugs and heavy users |
| When needed: Which person is asking? | A signed token from your sign-in provider | People who reinstall the app for a fresh allowance |
| When needed: Has this person paid? | An active subscription on record | Free users who get past the paywall |
Here is the server with none of the checks in place. Every caller reaches OpenAI, and you pay for all of them:
Checks added: 0 of 4. Still reaching OpenAI on your bill: scripts that call your URL directly, scripts that replay a token copied from the app, a runaway loop, people who reinstall the app for a fresh allowance and free users who get past the paywall, along with your users’ normal requests.
Check 1: Is this request from your app?
Your app can’t prove itself with a password, because any secret inside the app can be extracted. That is the problem we started with. Apple offers a better proof. With App Attest, Apple confirms that a request comes from a genuine, unchanged copy of your app on a real Apple device. A script on a laptop can’t produce that proof, and neither can a modified copy of your app.
Ask for a proof on every request
Many setups check the proof once, then give the app a session token that works for an hour. That token is a password again. Someone can copy it from the app’s traffic and use it from a script until it expires.
Asking for a fresh proof on every request closes that gap. Each proof is signed by a key that never leaves the phone and works for one request only, so a copied proof or token is useless. Every request your server pays for has to come from your app on a real device, at that moment.
Watch out: making the app send a proof does nothing unless the server requires it. One developer set up attestation in their app and could still call their endpoint with curl from a desktop, because the check wasn’t enforced on that endpoint.
App Attest doesn’t work in the Simulator, and a few devices fail it. Keep any debug shortcut out of release builds, and refuse requests that fail the check instead of quietly letting them through.
The steps on the app and the server, and what to do when App Attest fails, are in How to use App Attest to protect your AI backend.
With the proof required on every request, scripts are refused before they reach OpenAI:
Checks added: 1 of 4. Blocked: scripts that call your URL directly and scripts that replay a token copied from the app. Still reaching OpenAI on your bill: a runaway loop, people who reinstall the app for a fresh allowance and free users who get past the paywall, along with your users’ normal requests.
What’s still open: App Attest proves the request came from your app. It doesn’t stop a real person from using your real app as much as they like, or a bug in your app from sending requests in a loop.
Check 2: Is this request within limits?
A user can paste a whole book into the text box or tap “Regenerate” all day. A bug in your app can retry forever. Each request comes from your real app on a real device. Only limits stop them.
You don’t need a sign-in for this. Each install of your app has its own App Attest key, so the server can recognise it and give it its own allowance. Set the limits on the server, before the OpenAI call:
- Limit the work. Allow only the models the feature needs, and cap the answer length. A server that forwards any request to any model is a free OpenAI account for anyone who gets through.
- Cap the input. Refuse oversized input instead of paying to process it.
- Give each install an allowance. A number of requests a day and an amount to spend a month, counted on the server. A counter in
UserDefaultsis only a display: the user can reset it. - Cap the whole app. Allowances per install don’t stop a sudden wave of new installs. Set a budget for the whole app, and a hard monthly spend limit on your OpenAI project as the last line of defense. A budget alert alone stops nothing.
Count each request before you call OpenAI, not after. Otherwise ten requests sent at once all see the same remaining allowance and all get through.
With limits in place, a runaway loop stops at its allowance:
Checks added: 2 of 4. Blocked: scripts that call your URL directly, scripts that replay a token copied from the app and a runaway loop. Still reaching OpenAI on your bill: people who reinstall the app for a fresh allowance and free users who get past the paywall, along with your users’ normal requests.
These two checks are a solid baseline. Every request your server pays for comes from your real app on a real device, and no install, bug or rush of new users can spend more than you set.
What the two checks leave open
To set each install’s allowance, ask yourself one question: would you be happy to give it to anyone who installs the app? The answer depends on two gaps the baseline leaves:
- It counts installs, not people. Reinstalling the app gives a fresh allowance, someone with an iPhone and an iPad gets two, and you can block an install but not a person. Each fresh start takes a real device and a few minutes, so this only matters when the allowance is worth that effort.
- Your paywall lives only in the app. The server gives every install the same allowance, and only the paywall screen decides who may use it. Getting past that screen takes a jailbroken phone and someone willing to tamper with your app while it runs, which App Attest can’t reliably detect. They still get no more than one install’s allowance.
If every install gets a small free allowance, both gaps are small and you can stop here. Sign-in and payment checks add work for you and steps for your users, so add them for a reason.
That reason usually comes with a paid plan. If Pro users get 500 requests a day and free users get 10, a server that can’t tell them apart has to give every install 500, and only the paywall screen holds the rest back. The next two checks let the server give the big allowance only to the people who paid for it.
Add sign-in to count people, not installs
Sign-in lets your server tie an allowance to a person rather than to one install. Add it when you need any of these:
- An allowance that stays the same across reinstalls and devices.
- A way to block one person, or see how much one person uses.
- A payment check, because a purchase belongs to a person.
Have the app sign the user in, with Sign in with Apple or another sign-in provider. The provider gives the app a signed token, which the app sends with each request. The server checks that the token is genuine and current, reads the user ID from it, and refuses requests without one.
Never trust a user ID that the app puts in the request body. Anyone can change "userId": "alice" to "userId": "bob". The ID must come from a verified token.
Anonymous accounts, which many sign-in providers offer, don’t close this gap: getting a fresh anonymous account is as easy as reinstalling. Even a real sign-in doesn’t stop someone from creating a second account. It makes each fresh start slower, and it gives the payment check a person to look up.
With sign-in, a reinstall no longer resets the allowance:
Checks added: 3 of 4. Blocked: scripts that call your URL directly, scripts that replay a token copied from the app, a runaway loop and people who reinstall the app for a fresh allowance. Still reaching OpenAI on your bill: free users who get past the paywall, along with your users’ normal requests.
What’s still open: knowing who is asking doesn’t tell you whether they paid.
Add a payment check when paid users get more
Add a payment check when paying users get noticeably more than free users: a bigger allowance, better models, or AI only for Pro. It lets the server give that extra only to people who paid, instead of trusting the paywall screen in your app. Like any flag the app sends, an isPro: true value in the request is easy to fake.
Your server needs its own trustworthy answer. Confirm purchases on the server, with Apple’s App Store Server API or a subscription service such as RevenueCat. Then, on every paid request, the server checks one of two places:
- A mark in the user’s sign-in token, such as
pro, added after the purchase by your server code. It costs nothing to check, but it’s only as fresh as the token. - The server’s own subscription record, looked up by the user ID. It’s always current, but it’s a lookup on every request.
Plan for one delay. A purchase takes a moment to reach your server, and a new mark appears only in a newly issued token. When the server refuses a user who just paid, have the app refresh its token and retry a few times while it shows “Confirming your purchase…”. Don’t send the user back to a sign-in screen.
Four steps: the user buys Pro and the App Store confirms it; your server records the purchase, from App Store notifications or a subscription service; the app refreshes its sign-in token, which now carries pro; the server sees pro and allows the request. Between the purchase and the new token, the server refuses the paying user, so the app should show a confirming-your-purchase state and retry.
The same delay works in reverse after a refund: an older token can keep pro for a while. If that matters for your feature, check the subscription record instead of the token. Cancelling renewal is not the same as expiry: the user keeps access until the paid period ends.
With all four checks in place, only normal requests reach OpenAI, each within the allowance its user paid for:
Checks added: 4 of 4. Blocked: scripts that call your URL directly, scripts that replay a token copied from the app, a runaway loop, people who reinstall the app for a fresh allowance and free users who get past the paywall. Only your users’ normal requests reach OpenAI.
Run every check before the OpenAI call
Put together, the server’s job fits on one screen. This is pseudocode, not a particular SDK: the same order applies on any backend.
on each request:
  App:     verify this request's App Attest proof  → refuse if missing or invalid

  only if you added them:
  User:    verify the sign-in token                → refuse if missing or invalid
  Paid:    the user has an active subscription     → refuse if not

  Limits:  input is within the size cap            → refuse if too large
           reserve 1 of today's requests           → refuse if none left
           (for the install, or the person once they sign in)

  call OpenAI with your key, an allowed model and your output cap
  return the answer, never the key
Three rules make the order work:
- Everything that can refuse runs before the paid call. If a check fails, OpenAI is never contacted, so the refusal costs you nothing.
- The checks live in the same handler that spends. A separate “am I allowed?” endpoint followed by an unprotected AI endpoint leaves the door open, because the second one can be called on its own.
- The allowance is counted last. It’s the only step that writes to a database, so it runs only for requests that passed everything else.
A real handler needs a few more pieces around this: give the reserved request back if OpenAI fails, stream long answers, and make sure the app can’t write to the usage counter itself.
Test the requests that should fail
A request that works only proves the happy path. Before shipping, try each of these, and check in your OpenAI usage dashboard that none of the refused ones reached OpenAI:
| Try this | Expected result |
|---|---|
| Call your endpoint with curl, outside the app | Refused: no app proof |
| Copy a real request from the app’s traffic and send it again | Refused: each proof works once |
| Send far more input than the feature needs | Refused before OpenAI is called |
| Send 40 requests at once with 30 left today | Exactly 30 succeed; the other 10 are refused |
| With sign-in: call from the app while signed out | Refused: no verified user |
| With sign-in: add another user’s ID to the request body | Ignored: the server uses the ID from the token |
With a payment check: call as a user without pro | Refused, or given the free allowance |
| With a payment check: buy Pro, then use the feature immediately | Works after a token refresh, without a sign-in loop |
Also check that keys and authorization headers never appear in logs, and decide deliberately whether to log prompts, since they may contain private data.
Let App AI Gateway run the checks
Everything above is server code you write, deploy and maintain. App AI Gateway, the product we build, is that server, hosted. It holds your OpenAI key and runs the baseline without any sign-in: App Attest on every request, which is the default for a new iOS app, with each install counted as one user. Sign-in and the payment check are settings you turn on when you need them. Your app keeps its own sign-in and purchases. The hosted service has a free plan with 1,000 requests a month, or you can self-host it.
| Check | In App AI Gateway |
|---|---|
| 1. Your app? | An iOS application with your Team ID and Bundle ID. The gateway checks App Attest on every request. |
| 2. Limits? | Allowed models and paths, a maximum answer length, request limits for each install and the whole app, and monthly spending budgets for each install and the whole app. |
| When needed: Which person? | Signed-in users only: the gateway verifies the token from your sign-in provider. The monthly budget can then follow the person across installs, and you can block a person. |
| When needed: Paid? | Paid users only: the user’s token must carry a paid mark, added by your subscription setup after the purchase. |
In the app, the Swift package proves the app to the gateway and signs every request. You send OpenAI’s own request format through it, so existing request code barely changes. A partial example of the baseline setup:
import AppAIGateway

// The baseline: no sign-in, each install counted as one user.
// The gateway checks App Attest on every request.
let gateway = AppAIGatewayClient(
    appID: "YOUR_APP_ID",
    baseURL: URL(string: "https://api.appaigateway.com")!,
    authMode: .appAttestInstall
)

// A normal OpenAI Responses request, signed for the gateway.
let (data, response) = try await gateway.withAuthorizedRequest(
    provider: .openai,
    providerPath: "v1/responses",
    body: try JSONEncoder().encode([
        "model": "gpt-5.6-sol",
        "input": "Suggest a name for my cat."
    ]),
    contentType: "application/json"
) { try await URLSession.shared.data(for: $0) }
A few limits to know before choosing it:
- Request limits stay per install, even with sign-in. Only the monthly budget can follow a person.
- The payment check lets only paying users in. It can’t give free users a smaller allowance in the same app.
- The gateway checks the paid mark when it issues its own one-hour credential. Removing the mark doesn’t cut off a credential that was already issued, on top of any delay in updating the user’s token.
- Spending budgets count completed requests, so a burst of expensive calls can overshoot a budget slightly. Leave headroom.
- The gateway doesn’t talk to the App Store. You still set up purchases, sign-in and the app’s purchase-recovery flow.
Whichever you choose, the shape is the same: the key stays on a server, and the server decides, request by request, whether to spend your money.
To weigh the ready-made options against building it yourself, see the comparison of AI gateways for mobile apps. The glossary explains each protection in this article, with what it stops and what it leaves open.
References
- ~$55k Gemini API bill from Firebase iOS key abuse. What can I do now? — r/googlecloud
- Unauthorized API Key Usage — OpenAI Developer Community
- My API is constantly getting leaked — r/SwiftUI
- Protect OpenAI key using Firebase function — Stack Overflow
- Enforced App Check on my app and on my cloud functions does not prevent calls from outside — Stack Overflow
- Mind your key: An Empirical Study of LLM API Credential Leakage in iOS Apps — arXiv, 2026
- Best Practices for API Key Safety — OpenAI Help Center
- Validating apps that connect to your server — Apple Developer
- App Store Server API — Apple Developer
- Spend limits — OpenAI API docs